Background Information
 Danger:
Do not look directly at the fiber interface, the laser in the fiber will hurt the eyes。
 note:
note:
Anti-static wrist strap or anti-static gloves
Bellows
Fiber strapping
Marker
Fiber engineering label
(optional) extraction clamp
Steps:
1. Confirm the number of interfaces to be docked and the docking relationship, and determine the route.
2. Select the fiber of the corresponding mode, quantity, and length according to the type of optical module used, the number of interfaces, and the distance of the survey.
3. Wear an antistatic wrist strap or antistatic gloves. If you wear an antistatic wrist strap, make sure that one end of the ESD wrist strap is grounded and the other end is in good contact with the wearer's skin.
4. Attach a temporary label to each end of each fiber and fill in the number with a marker. See the engineering label for the fiber for the method of operation.
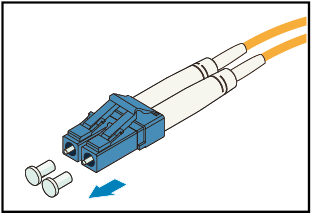
Remove the dust plug on the optical module and the dust cap on the fiber connector.
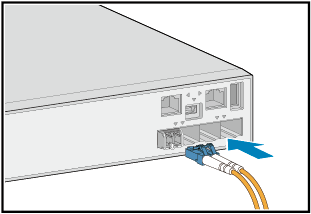
6. Connect the fiber to the optical module interface. After aligning the fiber connector and inserting it into the optical module interface, you hear a “click” sound, indicating that it is installed, as shown in Figure 1.
 Description:
Note that the transmitter and receiver of the fiber connector should not be connected. Refer to the label at the interface of the optical module.
Figure 1 Connecting the fiber to the interface
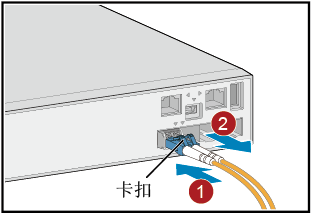
If you need to disassemble, first push the fiber connector inward and then pinch the buckle to pull out. Do not pull the fiber connector directly to pull the fiber, as shown in Figure 2.
 Description:
For the case where the interface is dense and the hand is not well operated, the fiber tongs can be used to assist the operation.
Figure 2 Pull out the fiber
7. Binding the fiber. The connected fibers are straightened out without being crossed, and bundled with the fiber ligatures once every 150 mm to 300 mm.
8. Replace all temporary labels with official fiber labels.